Engine Removal:
It's very important to label all the parts you take off the bike and in what order. I'm using a mix between some clear bags and some masking tape what can be written on the label all the parts.
Its also a good idea to have a box of disposable gloves and some kitchen paper handy.
Make sure the machine is on the center stand.
Its also a good idea to have a box of disposable gloves and some kitchen paper handy.
Make sure the machine is on the center stand.
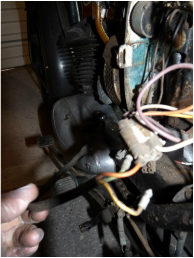
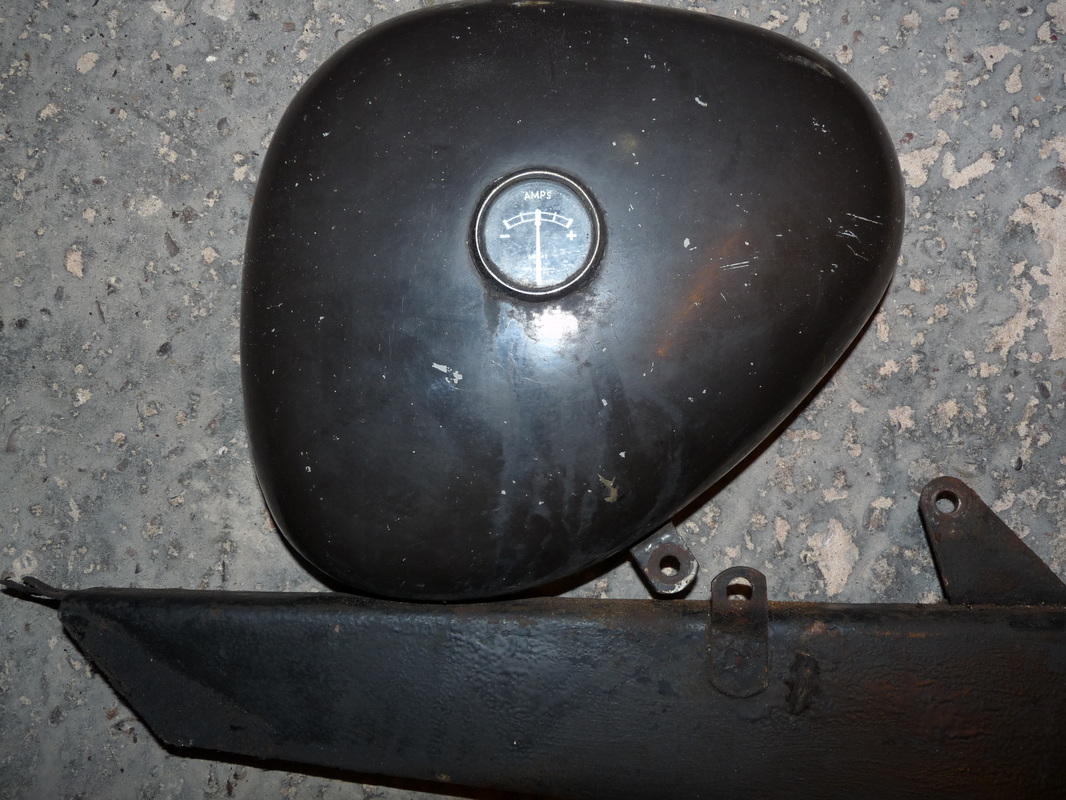
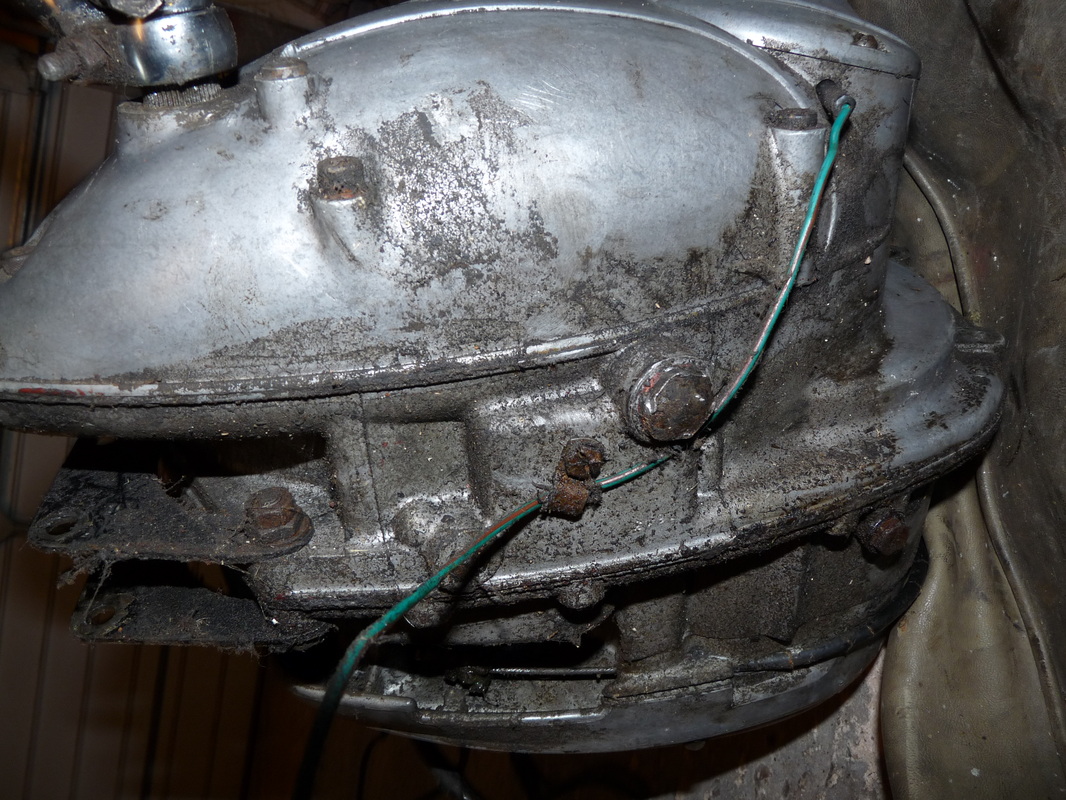
Disconnect the 3 wires coming from the alternator. (right hand side of the engine)
Note the wires match:
Red - Red
Green - Brown
Yellow - Yellow
The wires are connected using bullet connectors and will simply slide out if gently pulled.
Note the wires match:
Red - Red
Green - Brown
Yellow - Yellow
The wires are connected using bullet connectors and will simply slide out if gently pulled.
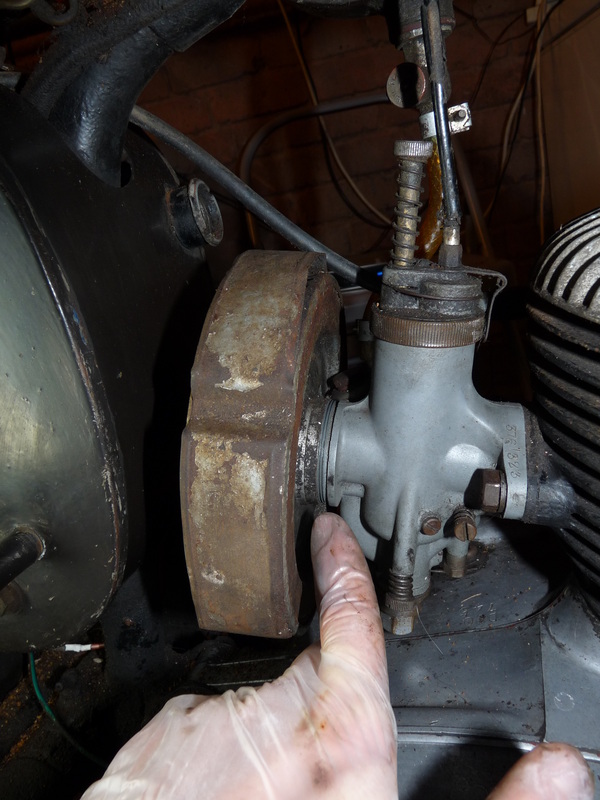
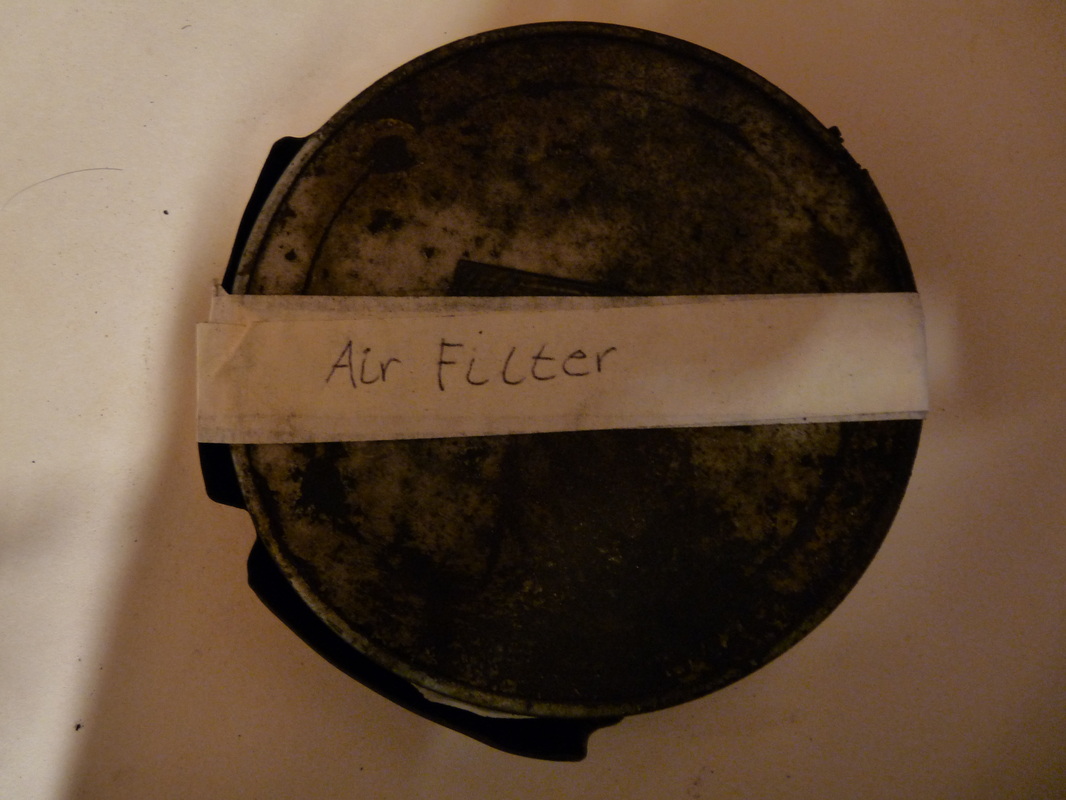
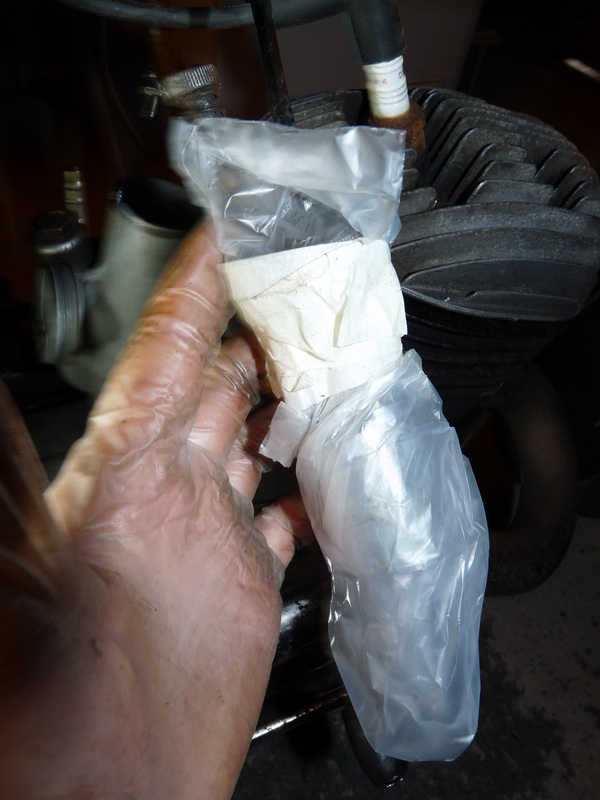
Remove the air filter from the carburetor my turning it anti-clockwise.
Wrap a strip of masking tape around it, write "air filter" on it and put it somewhere safe.
Wrap a strip of masking tape around it, write "air filter" on it and put it somewhere safe.
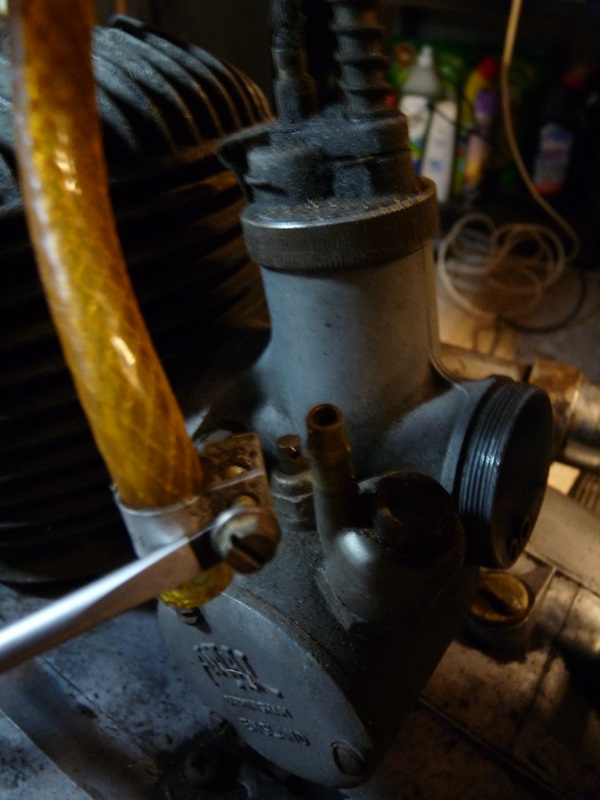
Disconnect the fuel pipe by loosening the the screw, with a flat-headed screwdriver, and easing it off the carburetor.
After a long time, particularly if the bike has been stood outside, for a long time the fuel pipe can go solid and loose it's flexibility making it difficult to remove. I found that undoing the nut on the carburetor made it easier to remove. I used a 14mm socket to do this (SAE size 17/37)
Be sure to tighten the screw up again after the pipe is disconnected.
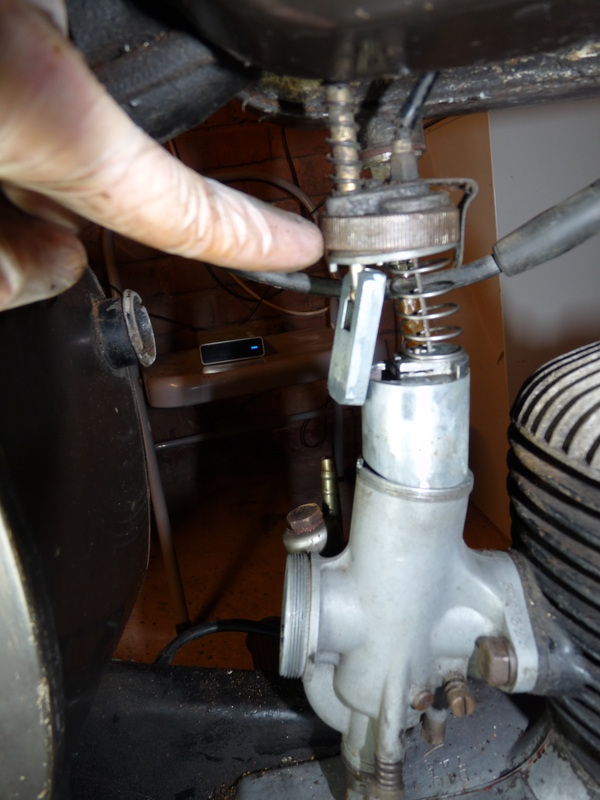
Remove the throttle needle slide assembly by undoing the knurled ring on top of the carburetor.
The ring takes quite a few turns before it comes off.
I placed the whole assembly in a bag for the time being to make sure I don't loose any parts.
The ring takes quite a few turns before it comes off.
I placed the whole assembly in a bag for the time being to make sure I don't loose any parts.
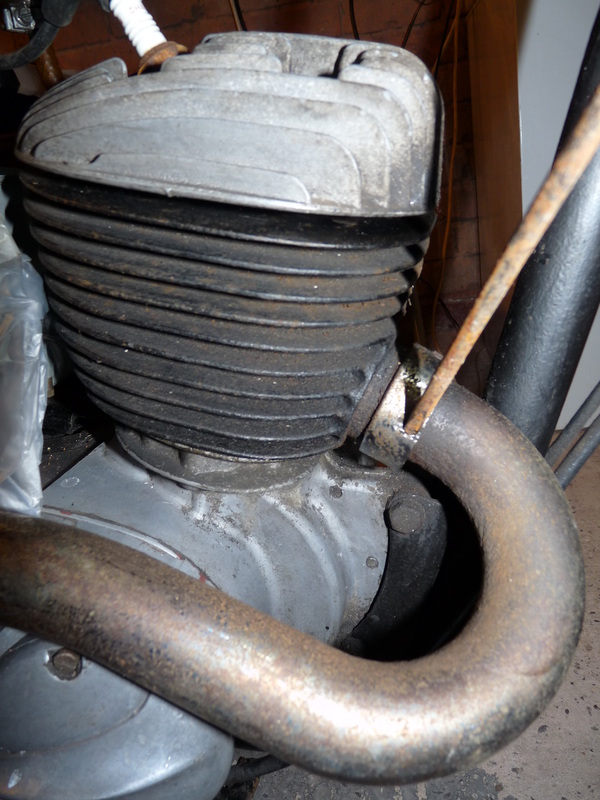
Next, remove the exhaust.
I did order a C spanner to do this but it hasn't arrived yet... not to worry.
You can remove the slotted exhaust nut by placing a flat-headed screwdriver in one of the slots and gently tap it so the nut will turn in an anti-clockwise direction. When it is loose you can finish undoing it by hand.
You can discard the copper ring that comes out of it. We will be replacing that.
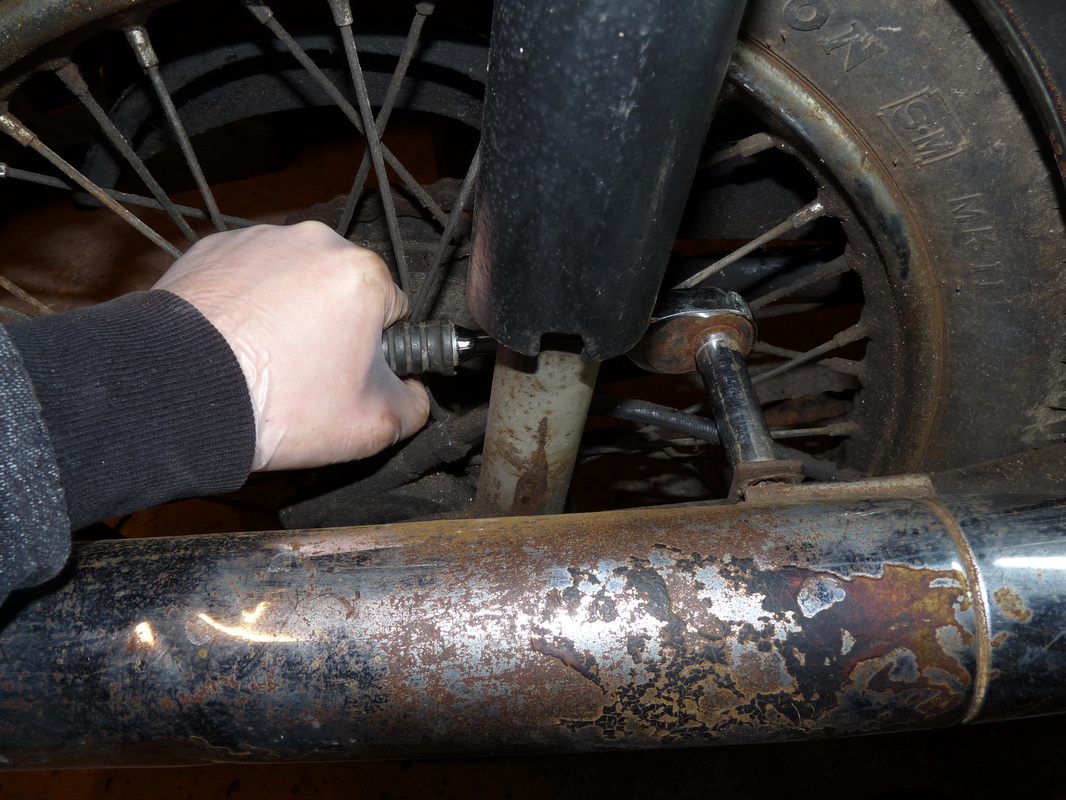
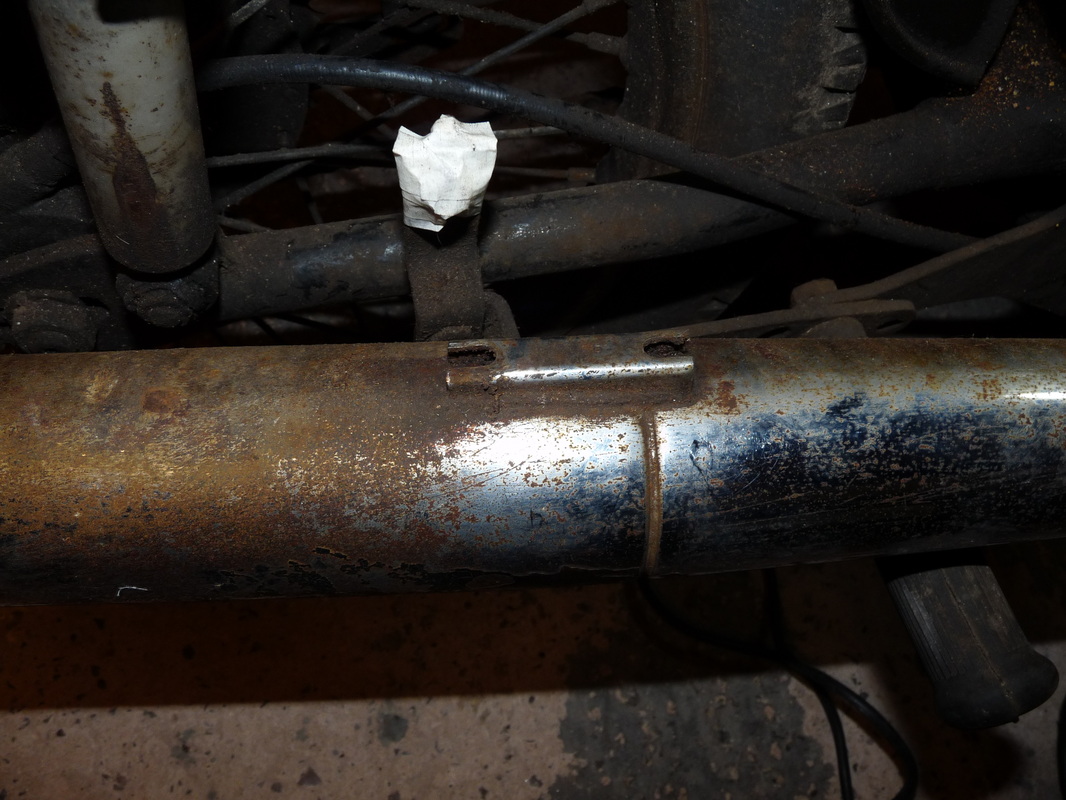
Next loosen the bolt on the back exhaust support bracket using an 11mm socket (SAE size 7/16) When it is loose the exhaust should slide off.
For now tighten the nut back up and maybe put a bit of tape around it if you want.
Put the whole exhaust assembly in a corner out of the way. I'm sure you wont need to label it.
For now tighten the nut back up and maybe put a bit of tape around it if you want.
Put the whole exhaust assembly in a corner out of the way. I'm sure you wont need to label it.
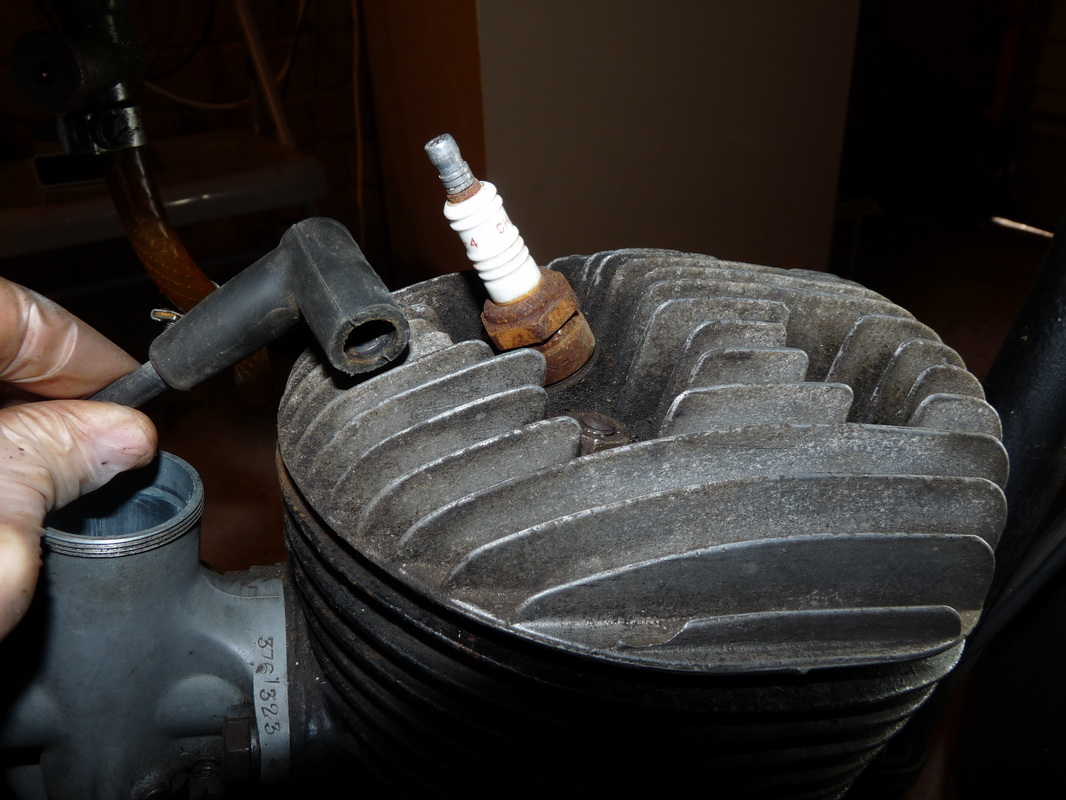
Disconnect the spark plug lead by giving it a bit of a tug.
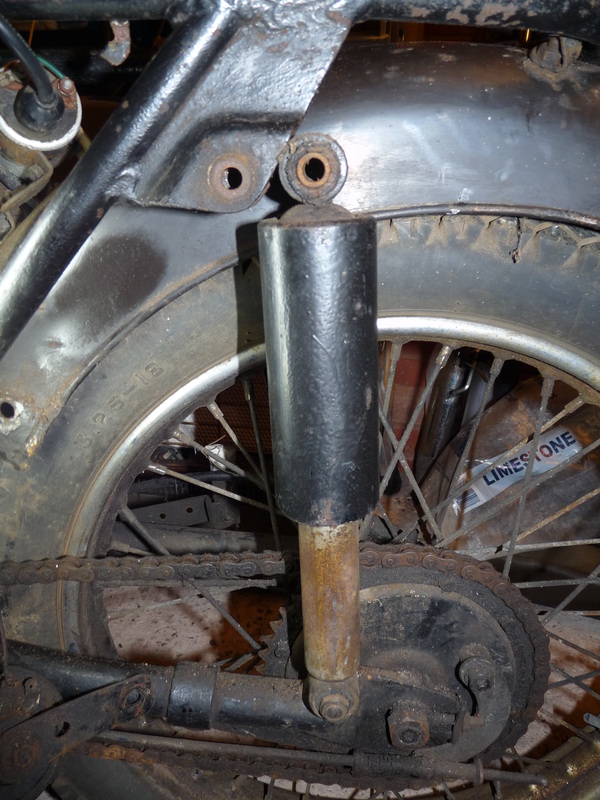
Next, remove the chain guard.
Start by undoing the bolt that connects the chain guard to the rear mudguard, using a 13mm socket (SAE size 17/32). Note, this bolt also holds the horn in place (round black object in photo).
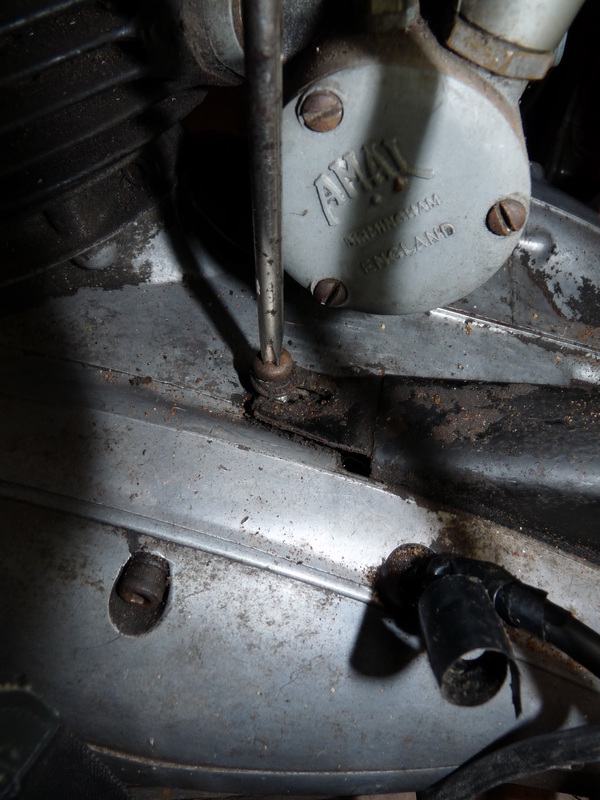
Then, using a Phillips screwdriver, remove the screw that connects the chain guard to the left hand crank case.
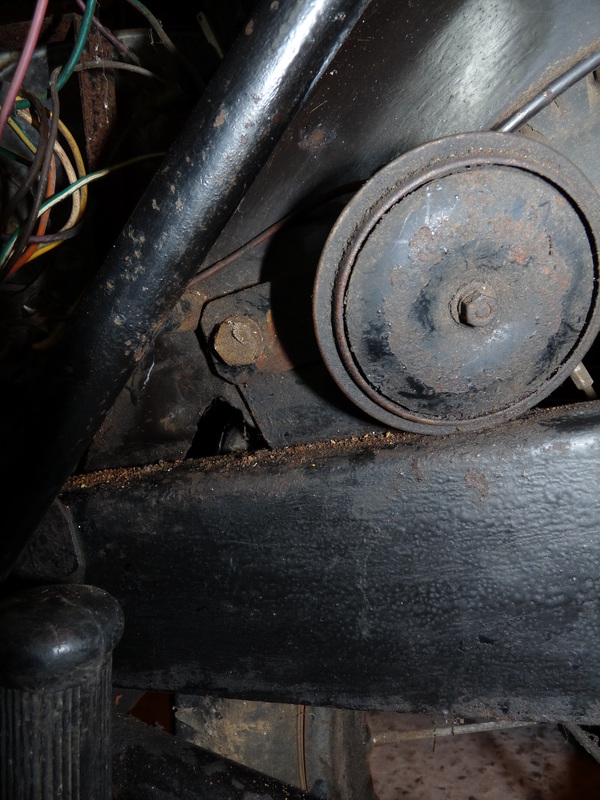
There is also a bolt that connects the the chain guard to the left hand side of the tool case (where the battery is). This was missing on mine but I've photographed where it should be.
Start by undoing the bolt that connects the chain guard to the rear mudguard, using a 13mm socket (SAE size 17/32). Note, this bolt also holds the horn in place (round black object in photo).
Then, using a Phillips screwdriver, remove the screw that connects the chain guard to the left hand crank case.
There is also a bolt that connects the the chain guard to the left hand side of the tool case (where the battery is). This was missing on mine but I've photographed where it should be.
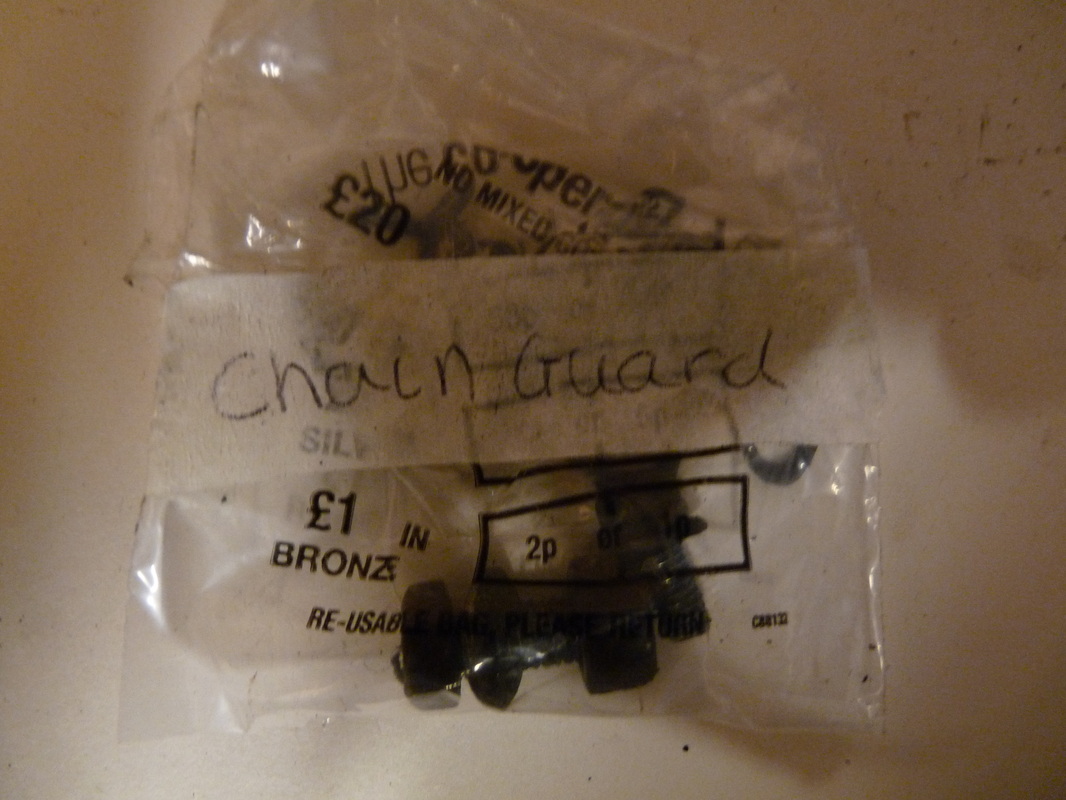
Place the nuts and bolts for the chain guard in a bag and label with a permanent marker or some more masking tape and a pen.
I find that those coin bags you can get from the post office/bank are very good for keeping nuts and bolts in.
Put the bag somewhere safe.... somewhere very safe... where no one will come and move it.
I find that those coin bags you can get from the post office/bank are very good for keeping nuts and bolts in.
Put the bag somewhere safe.... somewhere very safe... where no one will come and move it.
I also had to temporally undo this to slide the chain guard out.
Once the chain guard is out put it in the corner next to your exhaust.
Once the chain guard is out put it in the corner next to your exhaust.
Removing the chain.
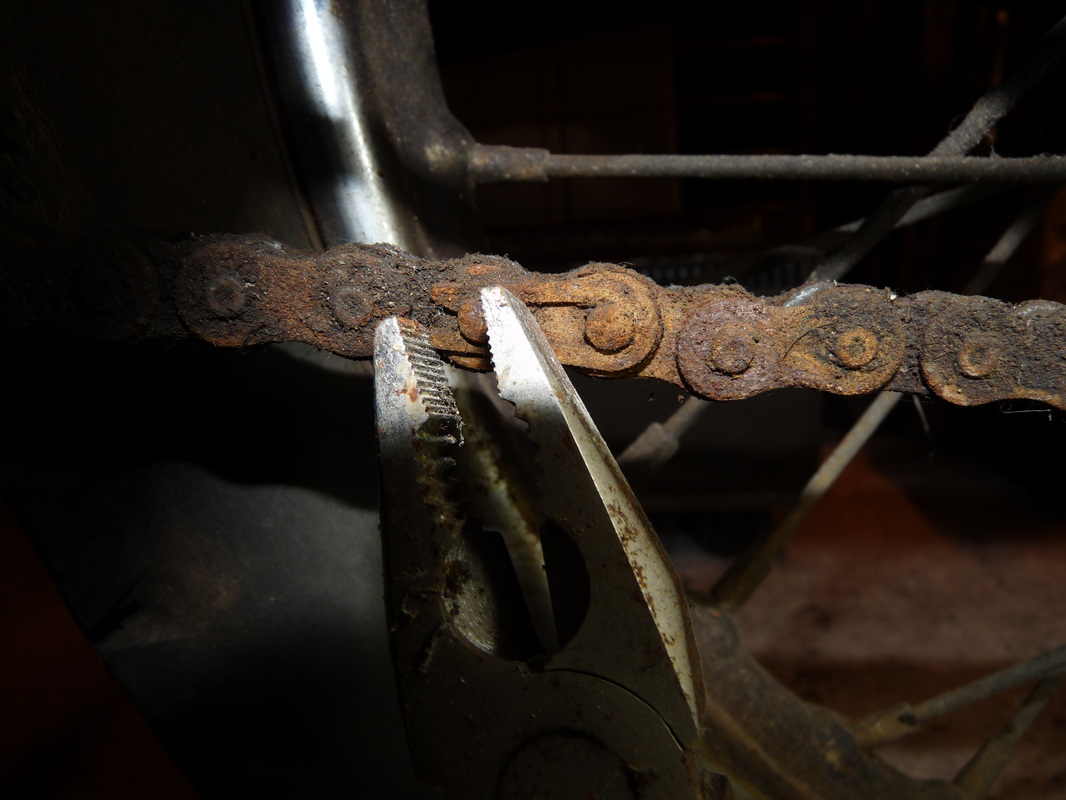
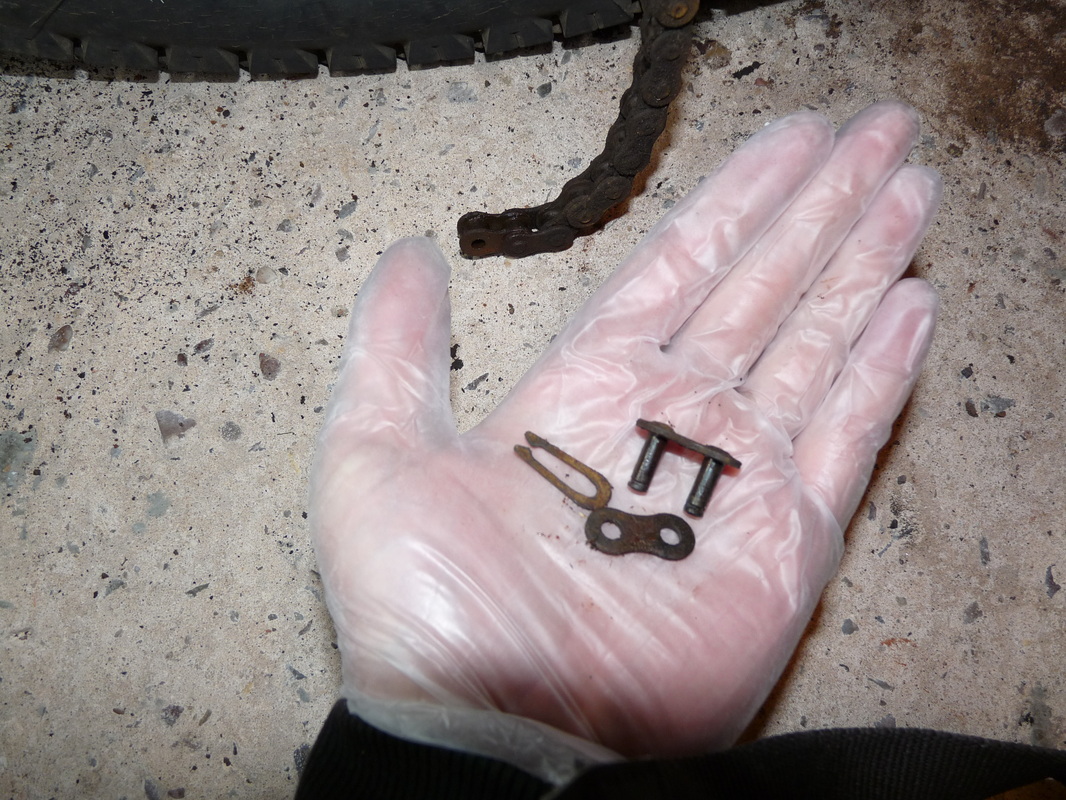
Locate the spring link on the chain. (this link sticks out a little and has a long C shaped clip that keeps in in place)
Using a pair of pliers, "pinch" the clip to remove it. You can also use a screwdriver to remove this if you prefer.
Remove the front plate and push the 2 link pins through the whole to break the chain.
Be sure not to loose any of the parts.
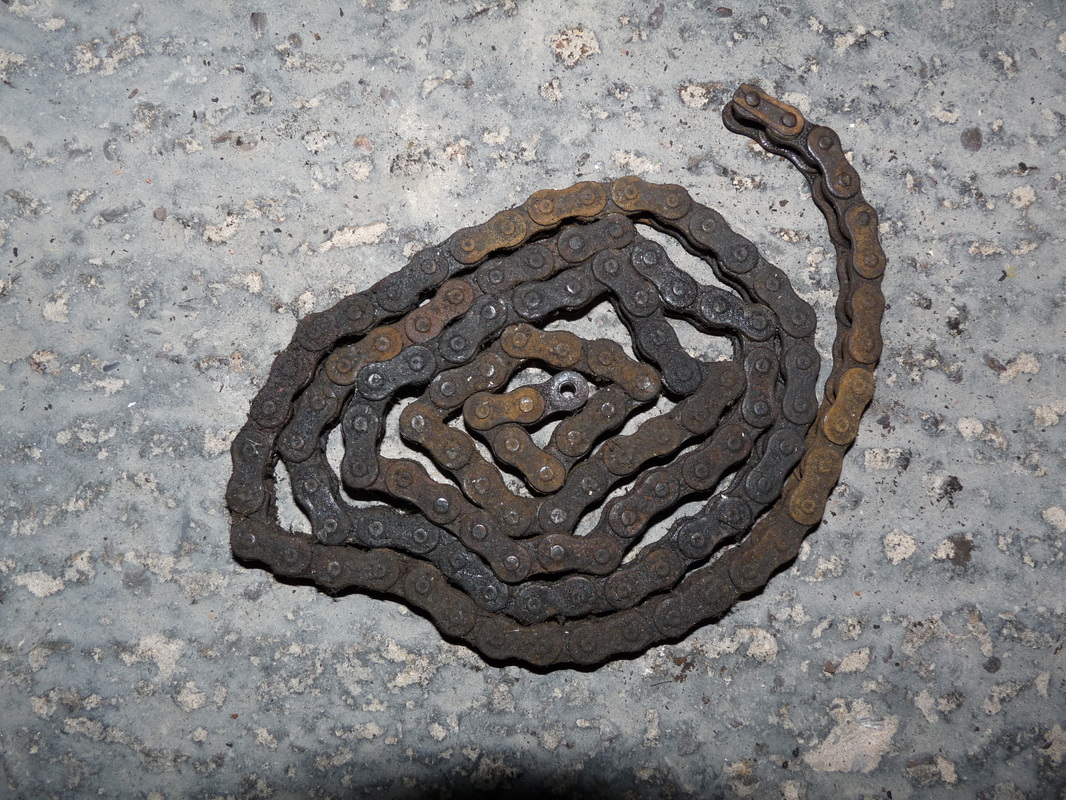
Carefully remove the chain.
Best way I've found of doing this is by rolling the bike backwards and with a little guidance the chain should drop out.
Replace the link you removed, save loosing it.
Put the chain in a bag and place it somewhere safe.
It's advisable to keep the chain off the ground and clean. But mine was so dirty it will need to be thoroughly cleaned, de-greased and oiled before going back on the bike.
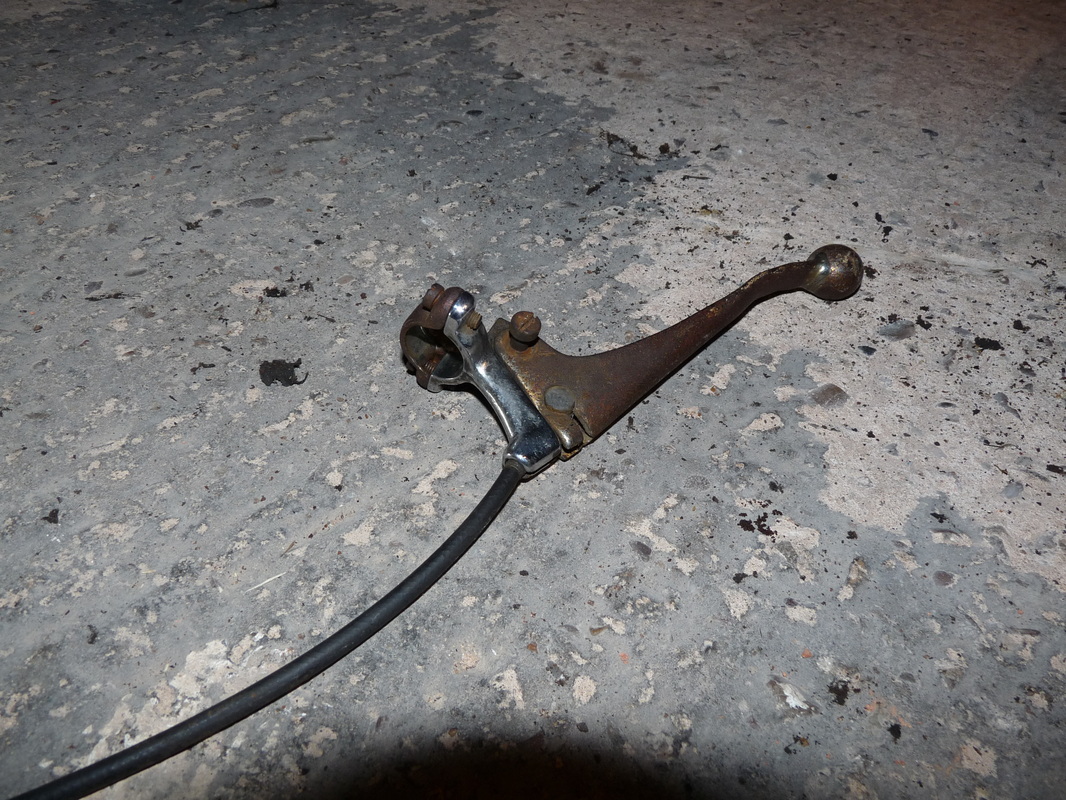
Next, remove the clutch leaver from the handle bars.
It looks like someone has attacked mine with a screwdriver in the past and rounded all the screws, so it was very awkward to get it off.
It looks like someone has attacked mine with a screwdriver in the past and rounded all the screws, so it was very awkward to get it off.

Next undo the 2 nuts on the bolts that connect the engine to the front of the frame, using a 13mm socket (SAE size 17/32), but don't remove the bolt just yet.
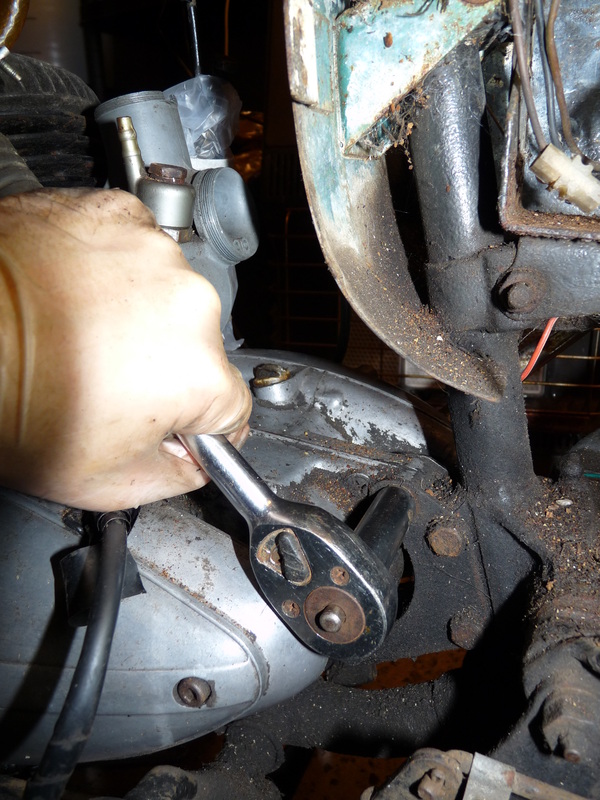
Do the same for the back 2 nuts. (not undo the 2 nuts shown in the picture and not the 3rd nut that the socket is attached to, I couldn't get a good photo of the socket attached to the proper nut because of the shadow)
Now ease out all 4 bolts from the frame and put them into a coin bag and label it "engine frame bolts"... or something similar.
Now ease out all 4 bolts from the frame and put them into a coin bag and label it "engine frame bolts"... or something similar.

Then simply lift the engine out and place it somewhere safe.

The final job is to detach the earth wire from the bottom of the engine.
and.... there you have it you're done.
Engine successfully removed, time for a cup of tea.
and.... there you have it you're done.
Engine successfully removed, time for a cup of tea.
